Step 2: New AutoRun Studio project
Back to TutorialLaunching AutoRun Studio
Open AutoRun Studio by double-clicking on the AutoRun Studio Configuration icon on the desktop, or by selecting the AutoRun Studio Configuration icon that appears on your Start Menu under All Programs.
Previous AutoRun Studio Project file
If you have selected the AutoRun Studio option to load the previous AutoRun File on startup, then it may prompt you to do so. For our demo purposes, choose NO, to create a new AutoRun Studio project file. You can always turn on/off the previous AutoRun File option from the Options Menu on the main AutoRun Studio screen.
Creating a new AutoRun Studio Project File
Select File | New to create a new AutoRun Studio Project File.
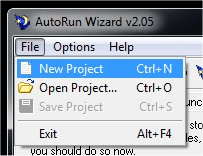
This will immediately open the Save AutoRun Project File dialog box. This is where you can select the Base Folder you created in the previous step. For our tutorial we will select the BURNCD folder on our hard drive. The filename of this new AutoRun Project File must be named autorun.dat. We do not support multiple AutoRun Project Files within the same Base Folder.
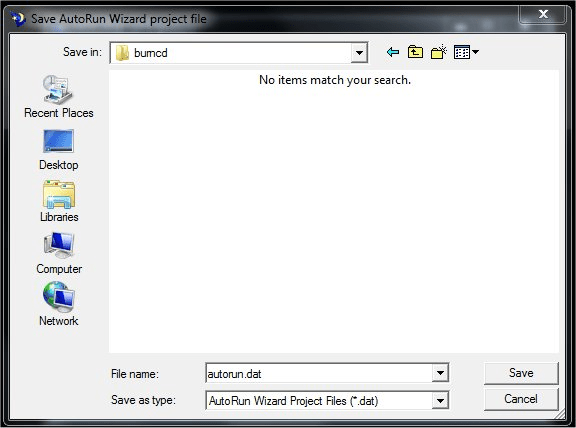
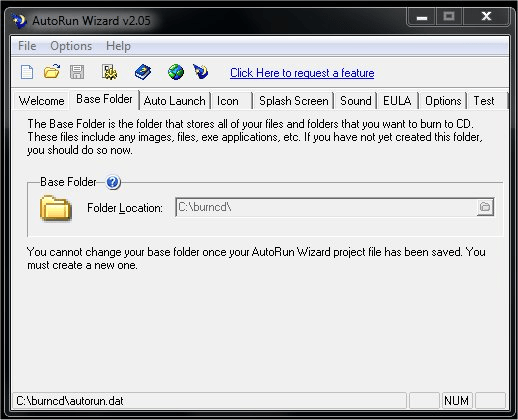
Click on the SAVE button to create a new AutoRun Studio Project File. This will automatically populate the Base Folder location on the Base Folder tab. You will also notice at the bottom of the screen it displays the path and filename to the currently loaded AutoRun Studio Project File.
Next Step
Everything on this page works in the free download. Build and test your first autorun in minutes.